- 1. Overview
- 2. Background
- 3. Procedure
- 4. Personal Thoughts
- 5. References
1. Overview
This document outlines the procedure to use the elliptic curve cryptography secp521r1 with OpenVPN on ASUSWRT.
2. Background
There was an unfortunate event...
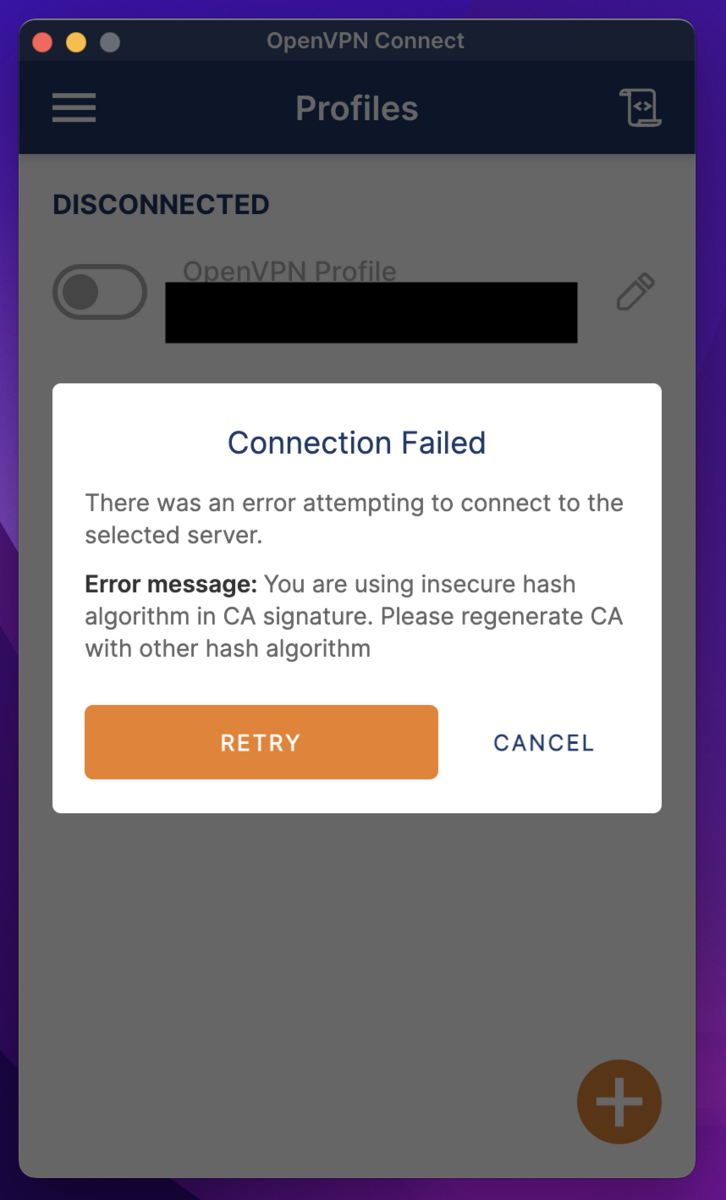
You are using insecure hash algorithm in CA signature. Please regenerate CA with other hash algorithm
From some version of OpenVPN 3.4 onwards, the default OpenVPN hash algorithm on ASUSWRT seems to have been deprecated.
- OpenVPN Connect 3.4.0.3121 get insecure hash algorithm in CA signature error - OpenVPN Support Forum
While it's okay to add the "insecure" option on the client side, I decided to update the certificate.
3. Procedure
3.1 Check the version of OpenVPN on ASUSWRT
※ I realized after writing, but it's no problem even if you don't know the version.
When starting or updating OpenVPN, the system log in the router management screen displays a log including the OpenVPN version.

Alternatively, you can log into the router via SSH or TELNET and check with openvpn --version.
# openvpn --version
OpenVPN 2.4.11 arm-buildroot-linux-gnueabi [SSL (OpenSSL)] [LZO] [LZ4] [EPOLL] [MH/PKTINFO] [AEAD] built on Jan  5 2022
library versions: OpenSSL 1.1.1k  25 Mar 2021, LZO 2.03
~
3.2 Verify supported encryption methods
You can verify the supported elliptic curve cryptos with openvpn --show-curves.
# openvpn --show-curves
Available Elliptic curves:
secp112r1
secp112r2
secp128r1
secp128r2
secp160k1
secp160r1
secp160r2
secp192k1
secp224k1
secp224r1
secp256k1
secp384r1
secp521r1
prime192v1
prime192v2
prime192v3
prime239v1
prime239v2
prime239v3
prime256v1
sect113r1
sect113r2
sect131r1
sect131r2
sect163k1
sect163r1
sect163r2
sect193r1
sect193r2
sect233k1
sect233r1
sect239k1
sect283k1
sect283r1
sect409k1
sect409r1
sect571k1
sect571r1
c2pnb163v1
c2pnb163v2
c2pnb163v3
c2pnb176v1
c2tnb191v1
c2tnb191v2
c2tnb191v3
c2pnb208w1
c2tnb239v1
c2tnb239v2
c2tnb239v3
c2pnb272w1
c2pnb304w1
c2tnb359v1
c2pnb368w1
c2tnb431r1
wap-wsg-idm-ecid-wtls1
wap-wsg-idm-ecid-wtls3
wap-wsg-idm-ecid-wtls4
wap-wsg-idm-ecid-wtls5
wap-wsg-idm-ecid-wtls6
wap-wsg-idm-ecid-wtls7
wap-wsg-idm-ecid-wtls8
wap-wsg-idm-ecid-wtls9
wap-wsg-idm-ecid-wtls10
wap-wsg-idm-ecid-wtls11
wap-wsg-idm-ecid-wtls12
Oakley-EC2N-3
Oakley-EC2N-4
brainpoolP160r1
brainpoolP160t1
brainpoolP192r1
brainpoolP192t1
brainpoolP224r1
brainpoolP224t1
brainpoolP256r1
brainpoolP256t1
brainpoolP320r1
brainpoolP320t1
brainpoolP384r1
brainpoolP384t1
brainpoolP512r1
brainpoolP512t1
Ideally, I would like to use ed25519, but since it's not supported, I will use secp521r1 this time.
3.3 Creation of Certificate & Private Key
For the OpenVPN setting on ASUSWRT, the following are necessary:
- CA Certificate
- CA Private Key
- Server Certificate
- Server Private Key
- DH Parameter File
- Client Certificate
- Client Private Key
We will create these using the Easy-RSA tool provided by OpenVPN.
Please install it using package managers like brew or apt.
3.3.1 Configuring /etc/easy-rsa/vars
By writing in the vars file, you can specify options without having to write them as arguments every time.
The vars file used this time is as follows:
set_var EASYRSA_DIGEST "sha512"  # Default sha256
set_var EASYRSA_ALGO  ec
set_var EASYRSA_CURVE secp521r1
set_var EASYRSA_CERT_EXPIRE    36500
set_var EASYRSA_CA_EXPIRE      36500
I want to use the same certificate until the ASUS router is replaced, so the validity period is set to 100 years.
The PATH might differ depending on your environment. For reference, on MacOS installed via brew, it will be /opt/homebrew/etc/easy-rsa/vars.
3.3.2 Initialize the CA
$ easyrsa init-pki

WARNING!!!

You are about to remove the EASYRSA_PKI at:
* /opt/homebrew/etc/pki

and initialize a fresh PKI here.

Type the word 'yes' to continue, or any other input to abort.
  Confirm removal: yes

* SECOND WARNING!!!

* This will remove everything in your current PKI directory.
  To keep your current settings use 'init-pki soft' instead.
  Using 'init-pki soft' is recommended.

Type the word 'yes' to continue, or any other input to abort.
  Remove current 'vars' file? yes


Notice
------
'init-pki' complete; you may now create a CA or requests.

Your newly created PKI dir is:
* /opt/homebrew/etc/pki

Using Easy-RSA configuration:
* /opt/homebrew/etc/easy-rsa/vars
3.3.3 Creating the CA
$ easyrsa build-ca nopass
Using Easy-RSA 'vars' configuration:
* /opt/homebrew/etc/easy-rsa/vars

Using SSL:
* /opt/homebrew/opt/openssl@3/bin/openssl OpenSSL 3.1.2 1 Aug 2023 (Library: OpenSSL 3.1.2 1 Aug 2023)
-----
You are about to be asked to enter information that will be incorporated
into your certificate request.
What you are about to enter is what is called a Distinguished Name or a DN.
There are quite a few fields but you can leave some blank
For some fields there will be a default value,
If you enter '.', the field will be left blank.
-----
Common Name (eg: your user, host, or server name) [Easy-RSA CA]:

Notice
------
CA creation complete. Your new CA certificate is at:
* /opt/homebrew/etc/pki/ca.crt
3.3.4 Creating DH Parameters
$ easyrsa gen-dh
Using Easy-RSA 'vars' configuration:
* /opt/homebrew/etc/easy-rsa/vars

Using SSL:
* /opt/homebrew/opt/openssl@3/bin/openssl OpenSSL 3.1.2 1 Aug 2023 (Library: OpenSSL 3.1.2 1 Aug 2023)
Generating DH parameters, 2048 bit long safe prime
..........................+...................................+..............................+............................................................................................................................................................+...............+.......................................................................................................................................................+.........................................................+................+...........+..............................................
~
+*++*++*++*++*++*++*++*++*++*++*++*++*++*
DH parameters appear to be ok.

Notice
------

DH parameters of size 2048 created at:
* /opt/homebrew/etc/pki/dh.pem
3.3.5 Creating Server Certificate & Private Key
$ easyrsa build-server-full server nopass
Using Easy-RSA 'vars' configuration:
* /opt/homebrew/etc/easy-rsa/vars

Using SSL:
* /opt/homebrew/opt/openssl@3/bin/openssl OpenSSL 3.1.2 1 Aug 2023 (Library: OpenSSL 3.1.2 1 Aug 2023)
-----

Notice
------
Private-Key and Public-Certificate-Request files created.
Your files are:
* req: /opt/homebrew/etc/pki/reqs/server.req
* key: /opt/homebrew/etc/pki/private/server.key

You are about to sign the following certificate:
Request subject, to be signed as a server certificate
for '36500' days:

subject=
    commonName                = server

Type the word 'yes' to continue, or any other input to abort.
  Confirm request details: yes

Using configuration from /opt/homebrew/etc/pki/openssl-easyrsa.cnf
Check that the request matches the signature
Signature ok
The Subject's Distinguished Name is as follows
commonName            :ASN.1 12:'server'
Certificate is to be certified until Aug 27 19:13:27 2123 GMT (36500 days)

Write out database with 1 new entries
Database updated

Notice
------
Certificate created at:
* /opt/homebrew/etc/pki/issued/server.crt

Notice
------
Inline file created:
* /opt/homebrew/etc/pki/inline/server.inline
3.3.6 Creating Client Certificate & Private Key
$ easyrsa build-client-full client nopass
Using Easy-RSA 'vars' configuration:
* /opt/homebrew/etc/easy-rsa/vars

Using SSL:
* /opt/homebrew/opt/openssl@3/bin/openssl OpenSSL 3.1.2 1 Aug 2023 (Library: OpenSSL 3.1.2 1 Aug 2023)
-----

Notice
------
Private-Key and Public-Certificate-Request files created.
Your files are:
* req: /opt/homebrew/etc/pki/reqs/client.req
* key: /opt/homebrew/etc/pki/private/client.key

You are about to sign the following certificate:
Request subject, to be signed as a client certificate
for '36500' days:

subject=
    commonName                = client

Type the word 'yes' to continue, or any other input to abort.
  Confirm request details: yes

Using configuration from /opt/homebrew/etc/pki/openssl-easyrsa.cnf
Check that the request matches the signature
Signature ok
The Subject's Distinguished Name is as follows
commonName            :ASN.1 12:'client'
Certificate is to be certified until Aug 27 19:14:39 2123 GMT (36500 days)

Write out database with 1 new entries
Database updated

Notice
------
Certificate created at:
* /opt/homebrew/etc/pki/issued/client.crt

Notice
------
Inline file created:
* /opt/homebrew/etc/pki/inline/client.inline
3.3.7 Verification of Deliverables
Below are the file paths for each item on MacOS.
Please refer to the execution results of the easyrsa command for the paths of your own deliverables.
- CA Certificate:
/opt/homebrew/etc/pki/ca.crt - CA Private Key:
/opt/homebrew/etc/pki/private/ca.key - Server Certificate:
/opt/homebrew/etc/pki/issued/server.crt - Server Private Key:
/opt/homebrew/etc/pki/private/server.key - DH Parameter File:
/opt/homebrew/etc/pki/dh.pem - Client Certificate:
/opt/homebrew/etc/pki/issued/client.crt - Client Private Key:
/opt/homebrew/etc/pki/private/client.key
3.4 Deployment on ASUS Router
Certificates and private keys for ASUS router's OpenVPN are stored in /jffs/openvpn/.
# ll /jffs/openvpn/
-rw-rw-rw-    1 admin    root           851 Sep 21 03:13 vpn_crt_server1_ca
-rw-------    1 admin    root           384 Sep 21 03:14 vpn_crt_server1_ca_key
-rw-rw-rw-    1 admin    root          3172 Sep 21 03:14 vpn_crt_server1_client_crt
-rw-------    1 admin    root           384 Sep 21 03:14 vpn_crt_server1_client_key
-rw-rw-rw-    1 admin    root          3289 Sep 21 03:15 vpn_crt_server1_crt
-rwxr-xr-x    1 admin    root           428 Sep 21 03:15 vpn_crt_server1_dh*
-rw-------    1 admin    root           384 Sep 21 03:15 vpn_crt_server1_key
Please copy or edit and write the files you created in section 3.3 into this location.
3.5 Rebooting ASUS Router's OpenVPN
By pressing the Apply button on the OpenVPN management page of the router, OpenVPN will restart even if there are no changes.
3.6 Connection Verification
If you can connect from the OpenVPN client after exporting the OpenVPN configuration file, then you are done.
4. Personal Thoughts
Even after repeatedly trying to change the OpenVPN certificates from the ASUSWRT UI, it only produced non-working OpenVPN configuration files. Replacing the certificates resolved the issue. I hope this can be helpful to someone.