akam1oの日記

クラウドを作るお仕事をしています

Proxmox VE で Windows 11 VM を立てる

0. 目次

1. 概要

Windows 11 の VM が必要になったので、Proxmox で Windows 11 の VM を立てる手順をまとめる

2. ISO のダウンロード

3. VM 作成

VirtIO Driver 用の ISO を追加しています

VirtIO SCSI を選択しています

Intel N100 の iGPU の SR-IOV デバイスPCI Passthrough しています

4. OS インストール

起動してすぐに何かしらキーを押さないと PXE boot になるので、起動後速やかにコンソール画面を出してキーを連打します

あとは基本的には Windows のインストール手順と変わりないですが、インストール先のデバイスがデフォルトだと見えません

そのためドライバーの読み込みを押下し、バージョンと一致する driver (今回の場合は w11/vioscsi.inf)を選択します

正常にドライバが当たれば VirtIO SCSI のディスクが表示されます

ネットワークデバイスに VirtIO を選択している場合は、この時点で VirtIO ドライバをインストールしておかないとこの後のセットアップで詰むので、忘れずにインストールします

5. 起動

無事起動したら完了です

6. 参考

Proxmox VE で Intel N100 の iGPU を SR-IOV で VM に PCI Passthrough する

0. 目次

1. 概要

Intel N100 がハードウェア的に SR-IOV に対応していたため Proxmox VE で VMPCI Passthrough します。

2. 背景

元々 Ryzen Renoir のホストを運用していて、それを vfio-mdev で VM に見せようとしていましたが時間がかかりそうなため、手軽にできそうな Intel の iGPU の SR-IOV で VMGPU に見せることにしました。 Intel の iGPU は Tiger Lake から SR-IOV に対応しています。

AMD iGPU のドライバをあれこれして vfio-mdev VM に見せる手法については追々検証予定です。

3. 手順

3.1 build 環境構築

# apt install pve-headers-$(uname -r) build-essential dkms mokutil sysfsutil git

3.2 dkms build

git clone

# git clone https://github.com/strongtz/i915-sriov-dkms.git

dkms.conf を編集

# KERNEL=$(uname -r); KERNEL=${KERNEL%-pve}
# sed -i 's/"@_PKGBASE@"/"i915-sriov-dkms"/g' ~/i915-sriov-dkms/dkms.conf
# sed -i 's/"@PKGVER@"/"'"$KERNEL"'"/g' ~/i915-sriov-dkms/dkms.conf

# cat dkms.conf
PACKAGE_NAME="i915-sriov-dkms"
PACKAGE_VERSION="6.5.11-8"

MAKE[0]="make -C ${kernel_source_dir} M=${dkms_tree}/${PACKAGE_NAME}/${PACKAGE_VERSION}/build KVER=${kernelver}"
CLEAN="make -C ${kernel_source_dir} M=${dkms_tree}/${PACKAGE_NAME}/${PACKAGE_VERSION}/build KVER=${kernelver} clean"

BUILT_MODULE_NAME[0]="i915"
DEST_MODULE_LOCATION[0]=/kernel/drivers/gpu/drm/i915

AUTOINSTALL=yes

dkms add

# dkms add .
# cd /usr/src/i915-sriov-dkms-$KERNEL
# dkms status

dkms build install

# dkms install -m i915-sriov-dkms -v $KERNEL -k $(uname -r) --force -j `nproc`
Sign command: /lib/modules/6.5.11-8-pve/build/scripts/sign-file
Signing key: /var/lib/dkms/mok.key
Public certificate (MOK): /var/lib/dkms/mok.pub

Building module:
Cleaning build area...
make -j4 KERNELRELEASE=6.5.11-8-pve -C /lib/modules/6.5.11-8-pve/build M=/var/lib/dkms/i915-sriov-dkms/6.5.11-8/build KVER=6.5.11-8-pve............................................................................................
Signing module /var/lib/dkms/i915-sriov-dkms/6.5.11-8/build/i915.ko
Cleaning build area...

i915.ko:
Running module version sanity check.
 - Original module
   - This kernel never originally had a module by this name
 - Installation
   - Installing to /lib/modules/6.5.11-8-pve/updates/dkms/
depmod...

3.3 grub.conf 更新

/etc/defaults/grubGRUB_CMDLINE_LINUXiommu=pt intel_iommu=on i915.enable_guc=3 i915.max_vfs=7 を追記してください。

参考までに私の grub.conf の一部を示します。

GRUB_CMDLINE_LINUX_DEFAULT="quiet "
GRUB_CMDLINE_LINUX="intel_idle.max_cstate=1 processor.max_cstate=1 cpufreq.default_governor=performance iommu=pt intel_iommu=on i915.enable_guc=3 i915.max_vfs=7"

update-grub, initramfs 更新

# update-grub
# update-initramfs -u -k all

3.4 sysfs.conf に追記

# echo "devices/pci0000:00/0000:00:02.0/sriov_numvfs = 2" > /etc/sysfs.conf

3.5 reboot

無事に上がってくることを祈りながら reboot

# reboot

3.6 確認

dmesg

# dmesg | grep i915
[    0.000000] Command line: BOOT_IMAGE=/boot/vmlinuz-6.5.11-8-pve root=/dev/mapper/pve-root ro intel_idle.max_cstate=1 processor.max_cstate=1 cpufreq.default_governor=performance iommu=pt intel_iommu=on video=efifb:off i915.enable_guc=3 i915.max_vfs=7 quiet
[    0.070552] Kernel command line: BOOT_IMAGE=/boot/vmlinuz-6.5.11-8-pve root=/dev/mapper/pve-root ro intel_idle.max_cstate=1 processor.max_cstate=1 cpufreq.default_governor=performance iommu=pt intel_iommu=on video=efifb:off i915.enable_guc=3 i915.max_vfs=7 quiet
[    3.435960] i915: module verification failed: signature and/or required key missing - tainting kernel
[    4.115709] i915 0000:00:02.0: Running in SR-IOV PF mode
[    4.116313] i915 0000:00:02.0: [drm] VT-d active for gfx access
[    4.116340] i915 0000:00:02.0: vgaarb: deactivate vga console
[    4.116410] i915 0000:00:02.0: [drm] Using Transparent Hugepages
[    4.116814] i915 0000:00:02.0: vgaarb: changed VGA decodes: olddecodes=io+mem,decodes=io+mem:owns=io+mem
[    4.119663] i915 0000:00:02.0: [drm] Finished loading DMC firmware i915/adlp_dmc.bin (v2.20)
[    4.119791] mei_hdcp 0000:00:16.0-b638ab7e-94e2-4ea2-a552-d1c54b627f04: bound 0000:00:02.0 (ops i915_hdcp_ops [i915])
[    4.130395] i915 0000:00:02.0: [drm] GT0: GuC firmware i915/tgl_guc_70.bin version 70.13.1
[    4.130403] i915 0000:00:02.0: [drm] GT0: HuC firmware i915/tgl_huc.bin version 7.9.3
[    4.135982] i915 0000:00:02.0: [drm] GT0: HuC: authenticated for all workloads!
[    4.136431] i915 0000:00:02.0: [drm] GT0: GUC: submission enabled
[    4.136433] i915 0000:00:02.0: [drm] GT0: GUC: SLPC enabled
[    4.136921] i915 0000:00:02.0: [drm] GuC RC: enabled
[    4.139594] mei_pxp 0000:00:16.0-fbf6fcf1-96cf-4e2e-a6a6-1bab8cbe36b1: bound 0000:00:02.0 (ops i915_pxp_tee_component_ops [i915])
[    4.139861] i915 0000:00:02.0: [drm] Protected Xe Path (PXP) protected content support initialized
[    4.197366] [drm] Initialized i915 1.6.0 20201103 for 0000:00:02.0 on minor 0
[    4.199293] snd_hda_intel 0000:00:1f.3: bound 0000:00:02.0 (ops i915_audio_component_bind_ops [i915])
[    4.199523] i915 0000:00:02.0: [drm] Cannot find any crtc or sizes
[    4.199631] i915 0000:00:02.0: [drm] Cannot find any crtc or sizes
[    4.199682] i915 0000:00:02.0: 7 VFs could be associated with this PF

PF mode で動いていることと 7VF まで割当できるログが確認できます。

[    4.115709] i915 0000:00:02.0: Running in SR-IOV PF mode
[    4.199682] i915 0000:00:02.0: 7 VFs could be associated with this PF

4. 利用

4.1 VF 作成

sysfs から VF 数を指定できます。 PCI device id は PF, VF とも同一になるので注意。

# echo 2 > /sys/bus/pci/devices/0000\:00\:02.0/sriov_numvfs

# lspci -vnn | grep VGA
00:02.0 VGA compatible controller [0300]: Intel Corporation Alder Lake-N [UHD Graphics] [8086:46d1] (prog-if 00 [VGA controller])
00:02.1 VGA compatible controller [0300]: Intel Corporation Alder Lake-N [UHD Graphics] [8086:46d1] (prog-if 00 [VGA controller])
00:02.2 VGA compatible controller [0300]: Intel Corporation Alder Lake-N [UHD Graphics] [8086:46d1] (prog-if 00 [VGA controller])

4.2 VMPCIバイスを追加

5. 起動

無事起動できました。

参考

Proxmox VE に CentOS Stream の VM テンプレートを Cloud Image から作成

概要

CentOS Stream の VM テンプレートを Cloud Image から作成する方法です。

Cloud Image のダウンロード

公式 Repo から必要なイメージをダウンロードしてください。

# wget https://cloud.centos.org/centos/8-stream/x86_64/images/CentOS-Stream-GenericCloud-8-latest.x86_64.qcow2

VM テンプレートの作成

テンプレート用 VM 作成

# qm create 9000 --memory 2048 --net0 virtio,bridge=vmbr0

ダウンロードしたイメージをインポート

# qm importdisk 9000 CentOS-Stream-GenericCloud-8-latest.x86_64.qcow2 local-lvm

scsi で attach

# qm set 9000 --scsihw virtio-scsi-pci --scsi0 local-lvm:vm-9000-disk-0

cloud-init 用の CD ドライブを用意

# qm set 9000 --ide2 local-lvm:cloudinit

attach したディスクを boot disk に設定

# qm set 9000 --boot c --bootdisk scsi0

シリアルコンソールに接続

# qm set 9000 --serial0 socket --vga serial0

テンプレートに変換

# qm template 9000

テンプレートからのデプロイ

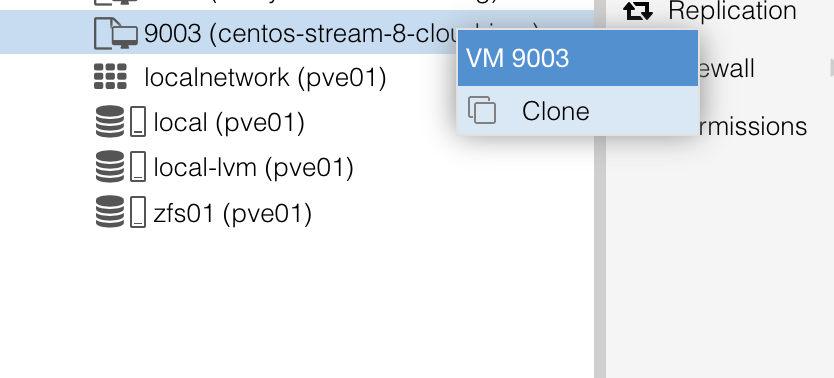
作成したテンプレートから Clone して VM を起動します。

参考

Proxmox VE に Rocky Linux の VM テンプレートを Cloud Image から作成

概要

Rocky LinuxVM テンプレートを Cloud Image から作成する方法です。

Cloud Image のダウンロード

公式 Repo から必要なイメージをダウンロードしてください。

# wget https://dl.rockylinux.org/pub/rocky/8/images/x86_64/Rocky-8-GenericCloud.latest.x86_64.qcow2

VM テンプレートの作成

テンプレート用 VM 作成

# qm create 9000 --memory 2048 --net0 virtio,bridge=vmbr0

ダウンロードしたイメージをインポート

# qm importdisk 9000 Rocky-8-GenericCloud.latest.x86_64.qcow2 local-lvm

scsi で attach

# qm set 9000 --scsihw virtio-scsi-pci --scsi0 local-lvm:vm-9000-disk-0

cloud-init 用の CD ドライブを用意

# qm set 9000 --ide2 local-lvm:cloudinit

attach したディスクを boot disk に設定

# qm set 9000 --boot c --bootdisk scsi0

シリアルコンソールに接続

# qm set 9000 --serial0 socket --vga serial0

テンプレートに変換

# qm template 9000

テンプレートからのデプロイ

作成したテンプレートから Clone して VM を起動します。

参考

Using secp521r1 with OpenVPN on ASUSWRT

1. Overview

This document outlines the procedure to use the elliptic curve cryptography secp521r1 with OpenVPN on ASUSWRT.

2. Background

There was an unfortunate event...
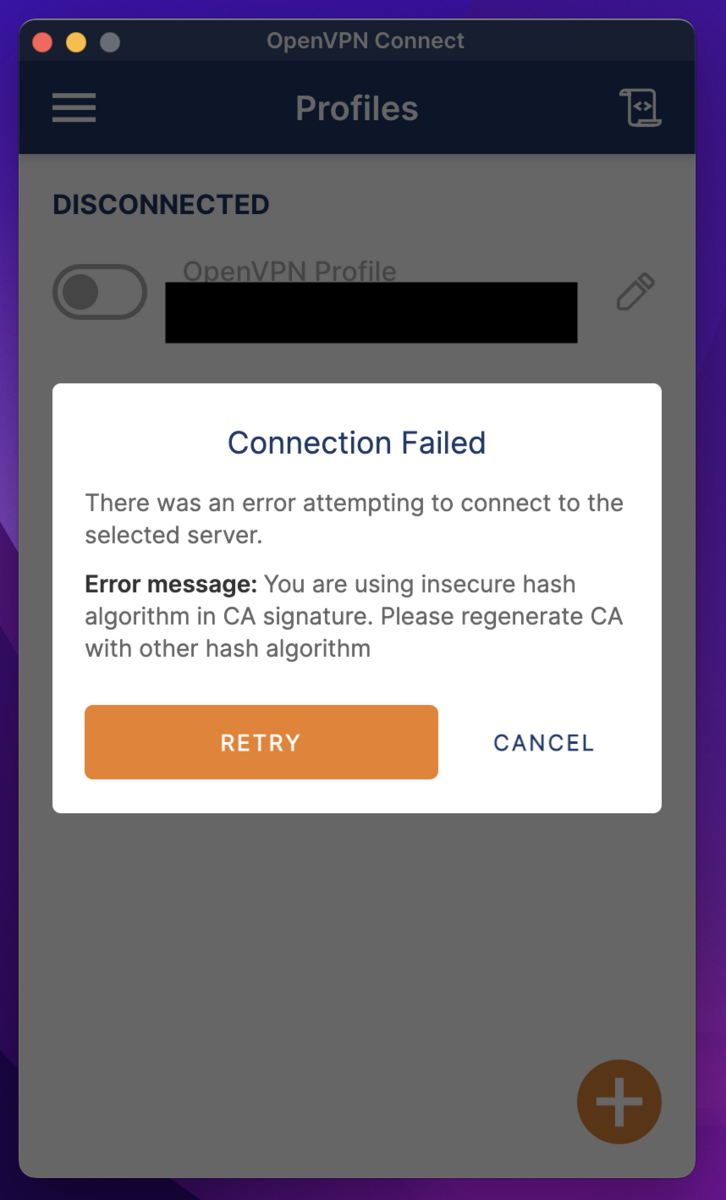
You are using insecure hash algorithm in CA signature. Please regenerate CA with other hash algorithm

From some version of OpenVPN 3.4 onwards, the default OpenVPN hash algorithm on ASUSWRT seems to have been deprecated.

While it's okay to add the "insecure" option on the client side, I decided to update the certificate.

3. Procedure

3.1 Check the version of OpenVPN on ASUSWRT

※ I realized after writing, but it's no problem even if you don't know the version.

When starting or updating OpenVPN, the system log in the router management screen displays a log including the OpenVPN version.

Alternatively, you can log into the router via SSH or TELNET and check with openvpn --version.

# openvpn --version
OpenVPN 2.4.11 arm-buildroot-linux-gnueabi [SSL (OpenSSL)] [LZO] [LZ4] [EPOLL] [MH/PKTINFO] [AEAD] built on Jan  5 2022
library versions: OpenSSL 1.1.1k  25 Mar 2021, LZO 2.03
~

3.2 Verify supported encryption methods

You can verify the supported elliptic curve cryptos with openvpn --show-curves.

# openvpn --show-curves
Available Elliptic curves:
secp112r1
secp112r2
secp128r1
secp128r2
secp160k1
secp160r1
secp160r2
secp192k1
secp224k1
secp224r1
secp256k1
secp384r1
secp521r1
prime192v1
prime192v2
prime192v3
prime239v1
prime239v2
prime239v3
prime256v1
sect113r1
sect113r2
sect131r1
sect131r2
sect163k1
sect163r1
sect163r2
sect193r1
sect193r2
sect233k1
sect233r1
sect239k1
sect283k1
sect283r1
sect409k1
sect409r1
sect571k1
sect571r1
c2pnb163v1
c2pnb163v2
c2pnb163v3
c2pnb176v1
c2tnb191v1
c2tnb191v2
c2tnb191v3
c2pnb208w1
c2tnb239v1
c2tnb239v2
c2tnb239v3
c2pnb272w1
c2pnb304w1
c2tnb359v1
c2pnb368w1
c2tnb431r1
wap-wsg-idm-ecid-wtls1
wap-wsg-idm-ecid-wtls3
wap-wsg-idm-ecid-wtls4
wap-wsg-idm-ecid-wtls5
wap-wsg-idm-ecid-wtls6
wap-wsg-idm-ecid-wtls7
wap-wsg-idm-ecid-wtls8
wap-wsg-idm-ecid-wtls9
wap-wsg-idm-ecid-wtls10
wap-wsg-idm-ecid-wtls11
wap-wsg-idm-ecid-wtls12
Oakley-EC2N-3
Oakley-EC2N-4
brainpoolP160r1
brainpoolP160t1
brainpoolP192r1
brainpoolP192t1
brainpoolP224r1
brainpoolP224t1
brainpoolP256r1
brainpoolP256t1
brainpoolP320r1
brainpoolP320t1
brainpoolP384r1
brainpoolP384t1
brainpoolP512r1
brainpoolP512t1

Ideally, I would like to use ed25519, but since it's not supported, I will use secp521r1 this time.

3.3 Creation of Certificate & Private Key

For the OpenVPN setting on ASUSWRT, the following are necessary:

  • CA Certificate
  • CA Private Key
  • Server Certificate
  • Server Private Key
  • DH Parameter File
  • Client Certificate
  • Client Private Key

We will create these using the Easy-RSA tool provided by OpenVPN.

Please install it using package managers like brew or apt.

3.3.1 Configuring /etc/easy-rsa/vars

By writing in the vars file, you can specify options without having to write them as arguments every time.

The vars file used this time is as follows:

set_var EASYRSA_DIGEST "sha512"  # Default sha256
set_var EASYRSA_ALGO  ec
set_var EASYRSA_CURVE secp521r1
set_var EASYRSA_CERT_EXPIRE    36500
set_var EASYRSA_CA_EXPIRE      36500

I want to use the same certificate until the ASUS router is replaced, so the validity period is set to 100 years.

The PATH might differ depending on your environment. For reference, on MacOS installed via brew, it will be /opt/homebrew/etc/easy-rsa/vars.

3.3.2 Initialize the CA

$ easyrsa init-pki

WARNING!!!

You are about to remove the EASYRSA_PKI at:
* /opt/homebrew/etc/pki

and initialize a fresh PKI here.

Type the word 'yes' to continue, or any other input to abort.
  Confirm removal: yes

* SECOND WARNING!!!

* This will remove everything in your current PKI directory.
  To keep your current settings use 'init-pki soft' instead.
  Using 'init-pki soft' is recommended.

Type the word 'yes' to continue, or any other input to abort.
  Remove current 'vars' file? yes


Notice
------
'init-pki' complete; you may now create a CA or requests.

Your newly created PKI dir is:
* /opt/homebrew/etc/pki

Using Easy-RSA configuration:
* /opt/homebrew/etc/easy-rsa/vars

3.3.3 Creating the CA

$ easyrsa build-ca nopass
Using Easy-RSA 'vars' configuration:
* /opt/homebrew/etc/easy-rsa/vars

Using SSL:
* /opt/homebrew/opt/openssl@3/bin/openssl OpenSSL 3.1.2 1 Aug 2023 (Library: OpenSSL 3.1.2 1 Aug 2023)
-----
You are about to be asked to enter information that will be incorporated
into your certificate request.
What you are about to enter is what is called a Distinguished Name or a DN.
There are quite a few fields but you can leave some blank
For some fields there will be a default value,
If you enter '.', the field will be left blank.
-----
Common Name (eg: your user, host, or server name) [Easy-RSA CA]:

Notice
------
CA creation complete. Your new CA certificate is at:
* /opt/homebrew/etc/pki/ca.crt

3.3.4 Creating DH Parameters

$ easyrsa gen-dh
Using Easy-RSA 'vars' configuration:
* /opt/homebrew/etc/easy-rsa/vars

Using SSL:
* /opt/homebrew/opt/openssl@3/bin/openssl OpenSSL 3.1.2 1 Aug 2023 (Library: OpenSSL 3.1.2 1 Aug 2023)
Generating DH parameters, 2048 bit long safe prime
..........................+...................................+..............................+............................................................................................................................................................+...............+.......................................................................................................................................................+.........................................................+................+...........+..............................................
~
+*++*++*++*++*++*++*++*++*++*++*++*++*++*
DH parameters appear to be ok.

Notice
------

DH parameters of size 2048 created at:
* /opt/homebrew/etc/pki/dh.pem

3.3.5 Creating Server Certificate & Private Key

$ easyrsa build-server-full server nopass
Using Easy-RSA 'vars' configuration:
* /opt/homebrew/etc/easy-rsa/vars

Using SSL:
* /opt/homebrew/opt/openssl@3/bin/openssl OpenSSL 3.1.2 1 Aug 2023 (Library: OpenSSL 3.1.2 1 Aug 2023)
-----

Notice
------
Private-Key and Public-Certificate-Request files created.
Your files are:
* req: /opt/homebrew/etc/pki/reqs/server.req
* key: /opt/homebrew/etc/pki/private/server.key

You are about to sign the following certificate:
Request subject, to be signed as a server certificate
for '36500' days:

subject=
    commonName                = server

Type the word 'yes' to continue, or any other input to abort.
  Confirm request details: yes

Using configuration from /opt/homebrew/etc/pki/openssl-easyrsa.cnf
Check that the request matches the signature
Signature ok
The Subject's Distinguished Name is as follows
commonName            :ASN.1 12:'server'
Certificate is to be certified until Aug 27 19:13:27 2123 GMT (36500 days)

Write out database with 1 new entries
Database updated

Notice
------
Certificate created at:
* /opt/homebrew/etc/pki/issued/server.crt

Notice
------
Inline file created:
* /opt/homebrew/etc/pki/inline/server.inline

3.3.6 Creating Client Certificate & Private Key

$ easyrsa build-client-full client nopass
Using Easy-RSA 'vars' configuration:
* /opt/homebrew/etc/easy-rsa/vars

Using SSL:
* /opt/homebrew/opt/openssl@3/bin/openssl OpenSSL 3.1.2 1 Aug 2023 (Library: OpenSSL 3.1.2 1 Aug 2023)
-----

Notice
------
Private-Key and Public-Certificate-Request files created.
Your files are:
* req: /opt/homebrew/etc/pki/reqs/client.req
* key: /opt/homebrew/etc/pki/private/client.key

You are about to sign the following certificate:
Request subject, to be signed as a client certificate
for '36500' days:

subject=
    commonName                = client

Type the word 'yes' to continue, or any other input to abort.
  Confirm request details: yes

Using configuration from /opt/homebrew/etc/pki/openssl-easyrsa.cnf
Check that the request matches the signature
Signature ok
The Subject's Distinguished Name is as follows
commonName            :ASN.1 12:'client'
Certificate is to be certified until Aug 27 19:14:39 2123 GMT (36500 days)

Write out database with 1 new entries
Database updated

Notice
------
Certificate created at:
* /opt/homebrew/etc/pki/issued/client.crt

Notice
------
Inline file created:
* /opt/homebrew/etc/pki/inline/client.inline

3.3.7 Verification of Deliverables

Below are the file paths for each item on MacOS.

Please refer to the execution results of the easyrsa command for the paths of your own deliverables.

  • CA Certificate: /opt/homebrew/etc/pki/ca.crt
  • CA Private Key: /opt/homebrew/etc/pki/private/ca.key
  • Server Certificate: /opt/homebrew/etc/pki/issued/server.crt
  • Server Private Key: /opt/homebrew/etc/pki/private/server.key
  • DH Parameter File: /opt/homebrew/etc/pki/dh.pem
  • Client Certificate: /opt/homebrew/etc/pki/issued/client.crt
  • Client Private Key: /opt/homebrew/etc/pki/private/client.key

3.4 Deployment on ASUS Router

Certificates and private keys for ASUS router's OpenVPN are stored in /jffs/openvpn/.

# ll /jffs/openvpn/
-rw-rw-rw-    1 admin    root           851 Sep 21 03:13 vpn_crt_server1_ca
-rw-------    1 admin    root           384 Sep 21 03:14 vpn_crt_server1_ca_key
-rw-rw-rw-    1 admin    root          3172 Sep 21 03:14 vpn_crt_server1_client_crt
-rw-------    1 admin    root           384 Sep 21 03:14 vpn_crt_server1_client_key
-rw-rw-rw-    1 admin    root          3289 Sep 21 03:15 vpn_crt_server1_crt
-rwxr-xr-x    1 admin    root           428 Sep 21 03:15 vpn_crt_server1_dh*
-rw-------    1 admin    root           384 Sep 21 03:15 vpn_crt_server1_key

Please copy or edit and write the files you created in section 3.3 into this location.

3.5 Rebooting ASUS Router's OpenVPN

By pressing the Apply button on the OpenVPN management page of the router, OpenVPN will restart even if there are no changes.

3.6 Connection Verification

If you can connect from the OpenVPN client after exporting the OpenVPN configuration file, then you are done.

4. Personal Thoughts

Even after repeatedly trying to change the OpenVPN certificates from the ASUSWRT UI, it only produced non-working OpenVPN configuration files. Replacing the certificates resolved the issue. I hope this can be helpful to someone.

5. References

ASUSWRT の OpenVPN で楕円曲線暗号 secp521r1 を使う

1. 概要

ASUSWRT の OpenVPN楕円曲線暗号 secp521r1 を使う手順をまとめています。

2. 経緯

悲しい出来事がありました。。。

You are using insecure hash algorithm in CA signature. Please regenerate CA with other hash algorithm

OpenVPN の 3.4 のどこかから ASUSWRT のデフォルトの OpenVPN のハッシュアルゴリズムが非推奨になったようです。

クライアント側で insecure オプションをつけてもいいのですが、せっかくなので証明書を更新することにしました。

3. 手順

3.1 ASUSWRT の OpenVPN のバージョンの確認

※ 書いてから気付きましたが version 知らなくても問題ありません

OpenVPN の起動時や更新時にルータの管理画面のシステムログに OpenVPN のバージョンを含むログが流れます。

あるいは SSHTELNET でルータに入って openvpn --version でも確認できます。

# openvpn --version
OpenVPN 2.4.11 arm-buildroot-linux-gnueabi [SSL (OpenSSL)] [LZO] [LZ4] [EPOLL] [MH/PKTINFO] [AEAD] built on Jan  5 2022
library versions: OpenSSL 1.1.1k  25 Mar 2021, LZO 2.03
~

3.2 対応する暗号化方式の確認

openvpn --show-curves で対応する楕円曲線暗号を確認できます。

# openvpn --show-curves
Available Elliptic curves:
secp112r1
secp112r2
secp128r1
secp128r2
secp160k1
secp160r1
secp160r2
secp192k1
secp224k1
secp224r1
secp256k1
secp384r1
secp521r1
prime192v1
prime192v2
prime192v3
prime239v1
prime239v2
prime239v3
prime256v1
sect113r1
sect113r2
sect131r1
sect131r2
sect163k1
sect163r1
sect163r2
sect193r1
sect193r2
sect233k1
sect233r1
sect239k1
sect283k1
sect283r1
sect409k1
sect409r1
sect571k1
sect571r1
c2pnb163v1
c2pnb163v2
c2pnb163v3
c2pnb176v1
c2tnb191v1
c2tnb191v2
c2tnb191v3
c2pnb208w1
c2tnb239v1
c2tnb239v2
c2tnb239v3
c2pnb272w1
c2pnb304w1
c2tnb359v1
c2pnb368w1
c2tnb431r1
wap-wsg-idm-ecid-wtls1
wap-wsg-idm-ecid-wtls3
wap-wsg-idm-ecid-wtls4
wap-wsg-idm-ecid-wtls5
wap-wsg-idm-ecid-wtls6
wap-wsg-idm-ecid-wtls7
wap-wsg-idm-ecid-wtls8
wap-wsg-idm-ecid-wtls9
wap-wsg-idm-ecid-wtls10
wap-wsg-idm-ecid-wtls11
wap-wsg-idm-ecid-wtls12
Oakley-EC2N-3
Oakley-EC2N-4
brainpoolP160r1
brainpoolP160t1
brainpoolP192r1
brainpoolP192t1
brainpoolP224r1
brainpoolP224t1
brainpoolP256r1
brainpoolP256t1
brainpoolP320r1
brainpoolP320t1
brainpoolP384r1
brainpoolP384t1
brainpoolP512r1
brainpoolP512t1

本来なら ed25519 を使いたいところですが、対応していないので今回は secp521r1 を利用します。

3.3 証明書・秘密鍵の作成

ASUSWRT の OpenVPN 設定には下記のものが必要になります。

OpenVPN が提供している Easy-RSA というツールを使って作成していきます。

brew や apt などのパッケージマネージャで簡単に入りますのでインストールしてください。

3.3.1 /etc/easy-rsa/vars の設定

vars ファイルに書いておくことで毎回引数に書くことなくオプションが指定できます。

今回使用した vars ファイルは下記です。

set_var EASYRSA_DIGEST "sha512"  # Default sha256
set_var EASYRSA_ALGO  ec
set_var EASYRSA_CURVE secp521r1
set_var EASYRSA_CERT_EXPIRE    36500
set_var EASYRSA_CA_EXPIRE      36500

ASUS ルータのリプレイスまで同じ証明書を使いたいため、有効期限は100年としています。

PATH は環境によって異なると思いますので、よしなに読み替えてください。

参考までに MacOSbrew でインストールした場合には /opt/homebrew/etc/easy-rsa/vars になります。

3.3.2 認証局の初期化

$ easyrsa init-pki

WARNING!!!

You are about to remove the EASYRSA_PKI at:
* /opt/homebrew/etc/pki

and initialize a fresh PKI here.

Type the word 'yes' to continue, or any other input to abort.
  Confirm removal: yes

* SECOND WARNING!!!

* This will remove everything in your current PKI directory.
  To keep your current settings use 'init-pki soft' instead.
  Using 'init-pki soft' is recommended.

Type the word 'yes' to continue, or any other input to abort.
  Remove current 'vars' file? yes


Notice
------
'init-pki' complete; you may now create a CA or requests.

Your newly created PKI dir is:
* /opt/homebrew/etc/pki

Using Easy-RSA configuration:
* /opt/homebrew/etc/easy-rsa/vars

3.3.3 認証局の作成

$ easyrsa build-ca nopass
Using Easy-RSA 'vars' configuration:
* /opt/homebrew/etc/easy-rsa/vars

Using SSL:
* /opt/homebrew/opt/openssl@3/bin/openssl OpenSSL 3.1.2 1 Aug 2023 (Library: OpenSSL 3.1.2 1 Aug 2023)
-----
You are about to be asked to enter information that will be incorporated
into your certificate request.
What you are about to enter is what is called a Distinguished Name or a DN.
There are quite a few fields but you can leave some blank
For some fields there will be a default value,
If you enter '.', the field will be left blank.
-----
Common Name (eg: your user, host, or server name) [Easy-RSA CA]:

Notice
------
CA creation complete. Your new CA certificate is at:
* /opt/homebrew/etc/pki/ca.crt

3.3.4 DH パラメータ作成

$ easyrsa gen-dh
Using Easy-RSA 'vars' configuration:
* /opt/homebrew/etc/easy-rsa/vars

Using SSL:
* /opt/homebrew/opt/openssl@3/bin/openssl OpenSSL 3.1.2 1 Aug 2023 (Library: OpenSSL 3.1.2 1 Aug 2023)
Generating DH parameters, 2048 bit long safe prime
..........................+...................................+..............................+............................................................................................................................................................+...............+.......................................................................................................................................................+.........................................................+................+...........+..............................................
~
+*++*++*++*++*++*++*++*++*++*++*++*++*++*
DH parameters appear to be ok.

Notice
------

DH parameters of size 2048 created at:
* /opt/homebrew/etc/pki/dh.pem

3.3.5 サーバ証明書秘密鍵作成

$ easyrsa build-server-full server nopass
Using Easy-RSA 'vars' configuration:
* /opt/homebrew/etc/easy-rsa/vars

Using SSL:
* /opt/homebrew/opt/openssl@3/bin/openssl OpenSSL 3.1.2 1 Aug 2023 (Library: OpenSSL 3.1.2 1 Aug 2023)
-----

Notice
------
Private-Key and Public-Certificate-Request files created.
Your files are:
* req: /opt/homebrew/etc/pki/reqs/server.req
* key: /opt/homebrew/etc/pki/private/server.key

You are about to sign the following certificate:
Request subject, to be signed as a server certificate
for '36500' days:

subject=
    commonName                = server

Type the word 'yes' to continue, or any other input to abort.
  Confirm request details: yes

Using configuration from /opt/homebrew/etc/pki/openssl-easyrsa.cnf
Check that the request matches the signature
Signature ok
The Subject's Distinguished Name is as follows
commonName            :ASN.1 12:'server'
Certificate is to be certified until Aug 27 19:13:27 2123 GMT (36500 days)

Write out database with 1 new entries
Database updated

Notice
------
Certificate created at:
* /opt/homebrew/etc/pki/issued/server.crt

Notice
------
Inline file created:
* /opt/homebrew/etc/pki/inline/server.inline

3.3.6 クライアント証明書・秘密鍵作成

$ easyrsa build-client-full client nopass
Using Easy-RSA 'vars' configuration:
* /opt/homebrew/etc/easy-rsa/vars

Using SSL:
* /opt/homebrew/opt/openssl@3/bin/openssl OpenSSL 3.1.2 1 Aug 2023 (Library: OpenSSL 3.1.2 1 Aug 2023)
-----

Notice
------
Private-Key and Public-Certificate-Request files created.
Your files are:
* req: /opt/homebrew/etc/pki/reqs/client.req
* key: /opt/homebrew/etc/pki/private/client.key

You are about to sign the following certificate:
Request subject, to be signed as a client certificate
for '36500' days:

subject=
    commonName                = client

Type the word 'yes' to continue, or any other input to abort.
  Confirm request details: yes

Using configuration from /opt/homebrew/etc/pki/openssl-easyrsa.cnf
Check that the request matches the signature
Signature ok
The Subject's Distinguished Name is as follows
commonName            :ASN.1 12:'client'
Certificate is to be certified until Aug 27 19:14:39 2123 GMT (36500 days)

Write out database with 1 new entries
Database updated

Notice
------
Certificate created at:
* /opt/homebrew/etc/pki/issued/client.crt

Notice
------
Inline file created:
* /opt/homebrew/etc/pki/inline/client.inline

3.3.7 成果物の確認

下記は MacOS の場合のそれぞれのファイルのパスです。

easyrsa コマンドの実行結果にご自身の成果物のパスがありますので読み替えてください。

  • CA 証明書: /opt/homebrew/etc/pki/ca.crt
  • CA 秘密鍵/opt/homebrew/etc/pki/private/ca.key
  • サーバ証明書/opt/homebrew/etc/pki/issued/server.crt
  • サーバ秘密鍵/opt/homebrew/etc/pki/private/server.key
  • DH パラメータファイル: /opt/homebrew/etc/pki/dh.pem
  • クライアント証明書: /opt/homebrew/etc/pki/issued/client.crt
  • クライアント秘密鍵/opt/homebrew/etc/pki/private/client.key

3.4 ASUS ルータに配置

ASUS のルータの OpenVPN の証明書や秘密鍵/jffs/openvpn/ に格納されています。

# ll /jffs/openvpn/
-rw-rw-rw-    1 admin    root           851 Sep 21 03:13 vpn_crt_server1_ca
-rw-------    1 admin    root           384 Sep 21 03:14 vpn_crt_server1_ca_key
-rw-rw-rw-    1 admin    root          3172 Sep 21 03:14 vpn_crt_server1_client_crt
-rw-------    1 admin    root           384 Sep 21 03:14 vpn_crt_server1_client_key
-rw-rw-rw-    1 admin    root          3289 Sep 21 03:15 vpn_crt_server1_crt
-rwxr-xr-x    1 admin    root           428 Sep 21 03:15 vpn_crt_server1_dh*
-rw-------    1 admin    root           384 Sep 21 03:15 vpn_crt_server1_key

この位置に 3.3 で作ったファイルをコピー、または編集して書き込んでください。

3.5 ASUS ルータの OpenVPN の再起動

ルータの OpenVPN の管理画面の Apply ボタンを押すことで何も変更がなくても OpenVPN が再起動されます。

3.6 接続確認

OpenVPN 設定ファイルをエクスポートして、OpenVPN クライアントから接続できれば完了です。

4. 所感

ASUSWRT の OpenVPN の証明書変更を UI から何度やっても上手く動作しない OpenVPN 設定ファイルしか吐かないので、証明書を置き換えることで解決しました。どなたかの参考になれば幸いです。

5. 参考

Proxmox VE のホストを UPS に連動させてシャットダウンする

1. 概要

UPS を導入したので Proxmox VE のホストを UPS に連動させてシャットダウンしたい。

2. 機材

  • OMRON UPS BW55T

オムロン 無停電電源装置(常時商用給電/正弦波出力) 550VA/340W BW55T

APC の BR550S-JP と最後まで悩んだが、APC のほうは6ポートではあるが内3ポートはサージ対策のみで UPS 機能なしであったため、4ポートの OMRON のものを選んだ。

3. ソフトウェアについて

OMRON からは Linux 向けの UPS ソフトウェアは提供されていないが、NUT には対応している。

ベンダー提供のよくわからないソフトウェアを使うよりは NUT 使ったほうが安心感もある。

4. 導入

4.1 upsd install

# apt install nut

4.2 nut configuration

/etc/udev/rules.d/50-nut-ups.rules

※ nut group のユーザから ups の device が見える必要がある

ATTR{idVendor}=="0590", ATTR{idProduct}=="00d0", MODE="664", GROUP="nut", SYMLINK+="ups", TAG+="systemd", ENV{SYSTEMD_ALIAS}+="/sys/subsystem/ups/devices/ups"

/etc/nut/nut.conf

MODE=netserver

/etc/nut/ups.conf

[omron_bw55t]
    driver = blazer_usb
    port = /dev/ups
    vendorid = 0590
    productid = 00d0
    subdriver = ippon
    default.battery.voltage.high = 13.6
    default.battery.voltage.low = 11.6

/etc/nut/upsd.users

[upsmon]
    password = upspass
    upsmon master

4.3 nut-server start

# systemctl start nut-server.service

upsc コマンドで ups の情報が見えるようになる

# upsc omron_bw55t@localhost
Init SSL without certificate database
battery.charge: 90
battery.voltage: 13.40
battery.voltage.high: 13.6
battery.voltage.low: 11.6
device.type: ups
driver.name: blazer_usb
driver.parameter.pollinterval: 2
driver.parameter.port: /dev/ups
driver.parameter.productid: 00d0
driver.parameter.subdriver: ippon
driver.parameter.synchronous: auto
driver.parameter.vendorid: 0590
driver.version: 2.8.0
driver.version.internal: 0.14
driver.version.usb: libusb-1.0.26 (API: 0x1000109)
input.frequency: 50.0
input.voltage: 102.8
input.voltage.fault: 0.0
output.voltage: 103.2
ups.beeper.status: disabled
ups.delay.shutdown: 30
ups.delay.start: 180
ups.load: 10
ups.productid: 00d0
ups.status: OL BYPASS
ups.temperature: 41.5
ups.type: offline / line interactive
ups.vendorid: 0590

5. 自動シャットダウン設定

下記の conf に shutdown コマンドの記載があれば OK

/etc/nut/upsmon.conf

SHUTDOWNCMD "/sbin/shutdown -h +0"

6. 参考